Changing your car’s oil is one of the most essential maintenance tasks to keep your engine running smoothly. Regular oil changes help prevent wear and tear, improve fuel efficiency, and extend the life of your vehicle. While many drivers rely on professional service, performing an oil change at home can be a rewarding and cost-effective way to maintain your car.
In this guide, we’ll walk you through the steps of an oil change, the tools you’ll need, and some expert tips to ensure you do it right. If you’d rather leave it to the professionals, Yorba Linda Auto Service is always here to help keep your car running at its best.
What You’ll Need
Before you begin, gather the following tools and materials:
- The correct type and amount of oil for your vehicle (check your owner’s manual)
- A new oil filter
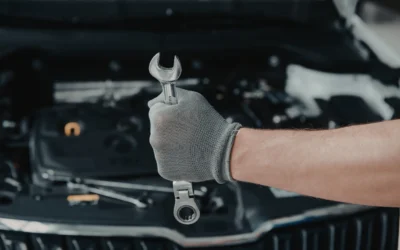
- A wrench to remove the drain plug
- An oil filter wrench
- A funnel
- A drain pan to collect old oil
- A pair of gloves and safety glasses
- Rags or paper towels for cleanup
Ensuring you have everything ready before starting will make the process smoother and less messy.
Step-by-Step Guide to Changing Your Oil
1. Prepare Your Vehicle
Park your car on a level surface and let the engine cool down for at least 15 minutes. This prevents burns from hot oil and allows the oil to settle. For better access, you may need to lift the car with a jack and secure it with jack stands.
2. Drain the Old Oil
Place the drain pan under the oil pan, then use a wrench to loosen the drain plug. Allow the old oil to fully drain into the pan. This step may take a few minutes. Once the oil has drained completely, securely tighten the drain plug back into place.
3. Replace the Oil Filter
Use an oil filter wrench to remove the old filter. Be prepared for some oil to spill out, so keep a rag handy. Before installing the new filter, apply a small amount of fresh oil to the rubber gasket to create a proper seal. Screw the new filter on by hand until it’s snug—avoid over-tightening.
4. Add Fresh Oil
Using a funnel, pour the new oil into the engine through the oil filler cap. Be sure to add the correct amount, as specified in your owner’s manual. Once done, replace the oil cap securely.
5. Check Your Work
Start your engine and let it run for a few minutes. Check underneath for leaks, then turn off the engine and wait a few minutes before checking the oil level with the dipstick. Add more oil if necessary to reach the correct level.
6. Dispose of Used Oil Properly
Never pour old oil down the drain or onto the ground. Most auto parts stores and repair shops accept used oil for recycling. Transfer the old oil into a sealed container and take it to a designated disposal center.
How Often Should You Change Your Oil?
Most modern vehicles require an oil change every 5,000 to 7,500 miles, but this varies depending on your car’s make, model, and driving habits. If you drive in stop-and-go traffic, tow heavy loads, or frequently take short trips, you may need to change your oil more often.
When to Visit a Professional
While changing your oil at home can be a great DIY project, there are times when professional service is the best option. If you’re unsure about the correct type of oil, have difficulty removing the oil filter, or simply prefer the convenience of expert care, Yorba Linda Auto Service is here for you.
Keep Your Engine Running Smoothly with Yorba Linda Auto Service
An oil change is one of the simplest ways to maintain your car’s health, but if you’d rather leave it to the experts, we’ve got you covered. Our team at Yorba Linda Auto Service provides professional oil changes and complete vehicle maintenance to keep your engine in top condition. Schedule your next service today!


